tech explorers, welcome!

Category: 3D design

3D design

PS5 Controller hanger

Simplicity at its best.

Today I’m sharing a very simple yet effective and elegant PS5 controller hanger.

Some concept/design images:

It just stands on its own without any screwing or glueing. It hangs from the PS5 itself and it’s expandable by design (probably you can fit up to 4 controllers just on one side).

Some real photos:

And finally, the .stl ready-to-print files:

https://theroamingworkshop.cloud/demos/PS5-DualSense-Holder-A_v1.stl

https://theroamingworkshop.cloud/demos/PS5-DualSense-Holder-B_v1.stl

🎅 Merry Christmas! 🎁

Also available on Cults3D for free download 💌

Batman with a grappling gun hanging in your living-room

The truth is that resin printing is next level. Despite the complications of cleaning, the result is really incredible, and today I’m showing you my first print in the Anycubic Photon Mono X2: a Batman you can hang in your living-room with his grappling gun.

Models

The print that you see is made of two free models. That's why here's a huge thank to the authors and my reference to their work:

All I've done is to add an armature to the model giving it the desired pose, and then sticking the gun to its hand. So here is my model so you can print it just as shown.

Preview

Extras

To finish the figure, you can create a cape and a hook so it can be hanged.

Cape

For the cape I've cut out a piece of fabric from an old sportswear. This is common clothing that's usually black and with an adequate brightness and texture.

Start cutting a square piece and then give it some shape.

In the top part, wrap a wire that will let you adjust the cape around the figure's neck.

Hook

Just find some kind of hook or clamp that lets you tie a thin thread around it. I've used this small paper clamp that I can hook in the books of my shelf.

And that's how you get your awesome Batman hanging in your living-room. Hope you liked it, and any ideas or comments, drop them on Twitter!

🐦 @RoamingWorkshop

DFRobot case for UNIHIKER

The small and efficient form factor of the UNIHIKER makes it really easy to craft a case for it.

For my smart home asssistant I was looking for an android-like style, and the DFRobot logo is perfect for the UNIHIKER, making tribute to their developers.

Github Repo

I've released a github repository where I will be open-sourcing all the model files and people can contribute with their own, so feel free to create a pull request and share your designs!

https://github.com/TheRoam/DFRobot-UNIHIKER-case/

It includes a github page where models can be previewed:

https://theroam.github.io/DFRobot-UNIHIKER-case/

Unihiker_DFRcase_v1

This is my first release, used for testing and including all the basic features for my home assistant.

Files

https://github.com/TheRoam/DFRobot-UNIHIKER-case/tree/main/blender

Features

  • Top openings for text display through touch screen.
  • Side opening for USB-C connection.
  • Back opening for external sensor cabling.
  • Back extrusions for 40mm speaker placement.
  • Foot-like support for vertical standing.

Case parts

  1. Bottom piece acts as a casing.
  2. Internal support piece holds UNIHIKER board to the bottom piece using the screws on the board.
  3. Top piece acts as a cover and clips on bottom piece.
  4. Feet support enables vertical standing of the case.
  5. Antennas just to match the deisgn of the DFRobot logo.

Assembly

  1. Place the screws of the internal support piece and screw it to the UNIHIKER
  1. Place the UNIHIKER inside the bottom piece. If you're using external sensors, you can bring your cabling outside using the void at the back.
  1. Hold the board to the case using a pair of 2.5mm screws from the back of the bottom piece.
  1. Fit the top piece in place as it should just hold itself.
  1. Place the feet support and the antennas in place. You can glue these to make sure that they stay in place.

And that's your case crafted with a nice DFRobot android look!

Share your thoughts on Twitter!

🐦 @RoamingWorkshop

BlenderGIS: 3D modelling in Blender with geographical information

Blender is (to me), the top free 3D modelling software. It’s got a huge community, tones of documentation, tutorials and, overall, continuous updates and improvement.

One of the most useful tools is BlenderGIS, an external plugin that lets us drop geographical data, georeferenced or not, and model with them.

Let’s see a use case with an elevation model.

Installation

First thing to do is to download and install Blender from an official source (their website) or from our OS app store:

https://www.blender.org/download/

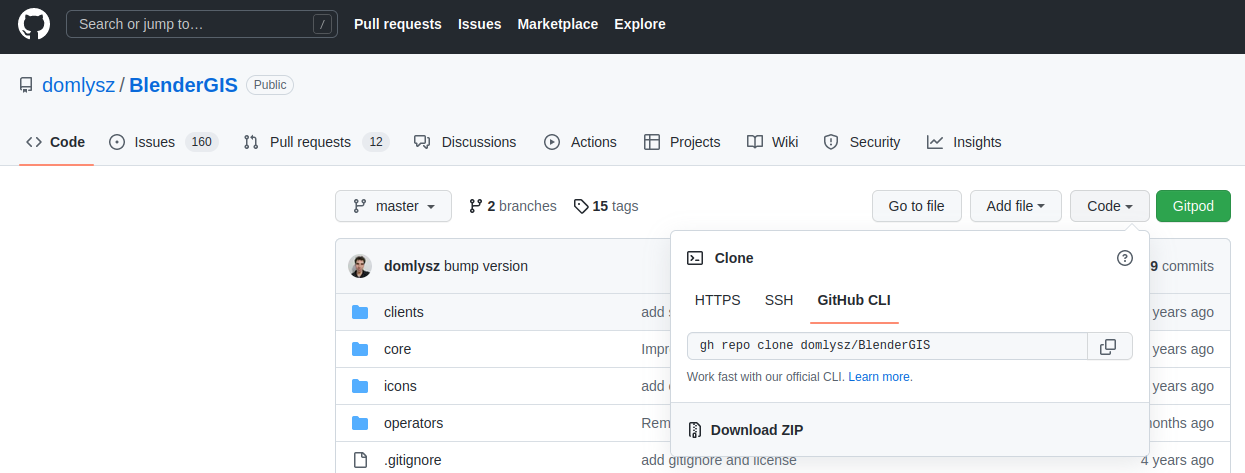
Now, download BlenderGIS from the author's github as a .zip file:

https://github.com/domlysz/BlenderGIS

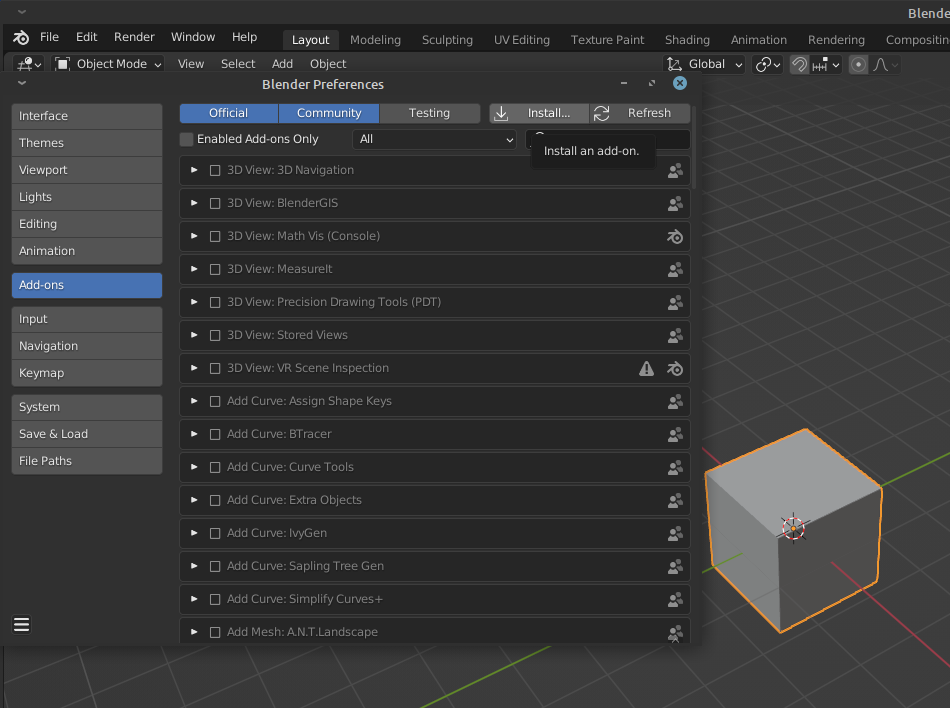
Let's now start Blender and open Add-ons settings (Edit > Preferences > Add-ons).

Press "Install..." and select the BlenderGIS .zip file.

Now you can search it and activate it.

You'll see there's a new "GIS" option in Blender's top bar.

Download geographical information

In this example I will use a Digital Terrain Model in ASCII format (.asc), as it is one of the working formats for BlenderGIS and also the standard for my download source.

If the information you download is in another format, like .tiff or .xyz, you can convert it using some software like QGIS or ArcGIS.

MDT

In my case, I will use MDT200 from spanish IGN, a terrain model with 200m cell size, as I want to show quite a large area that includes the province of Álava.

https://centrodedescargas.cnig.es/CentroDescargas/index.jsp

Orthophoto

We can also use an orthophoto as a terrain texture. For this, I will be using QGIS and I will load a WMS also from IGN so I can clip the satellite image exactly to the terrain tile extent.

Load the orthophoto and the terrain layers, then export the orthophoto layer as a rendered image and set the extension from the terrain layer. I will set the cell size to 20 meters (although the imagery allows up to 20cm cell size, which would result in a huge file; the 20m image is already 140MB).

TIP! One way to optimize detail is to generate a grid of smaller size images but higher resolution.

Modelling in Blender

Now it's all ready for Blender.

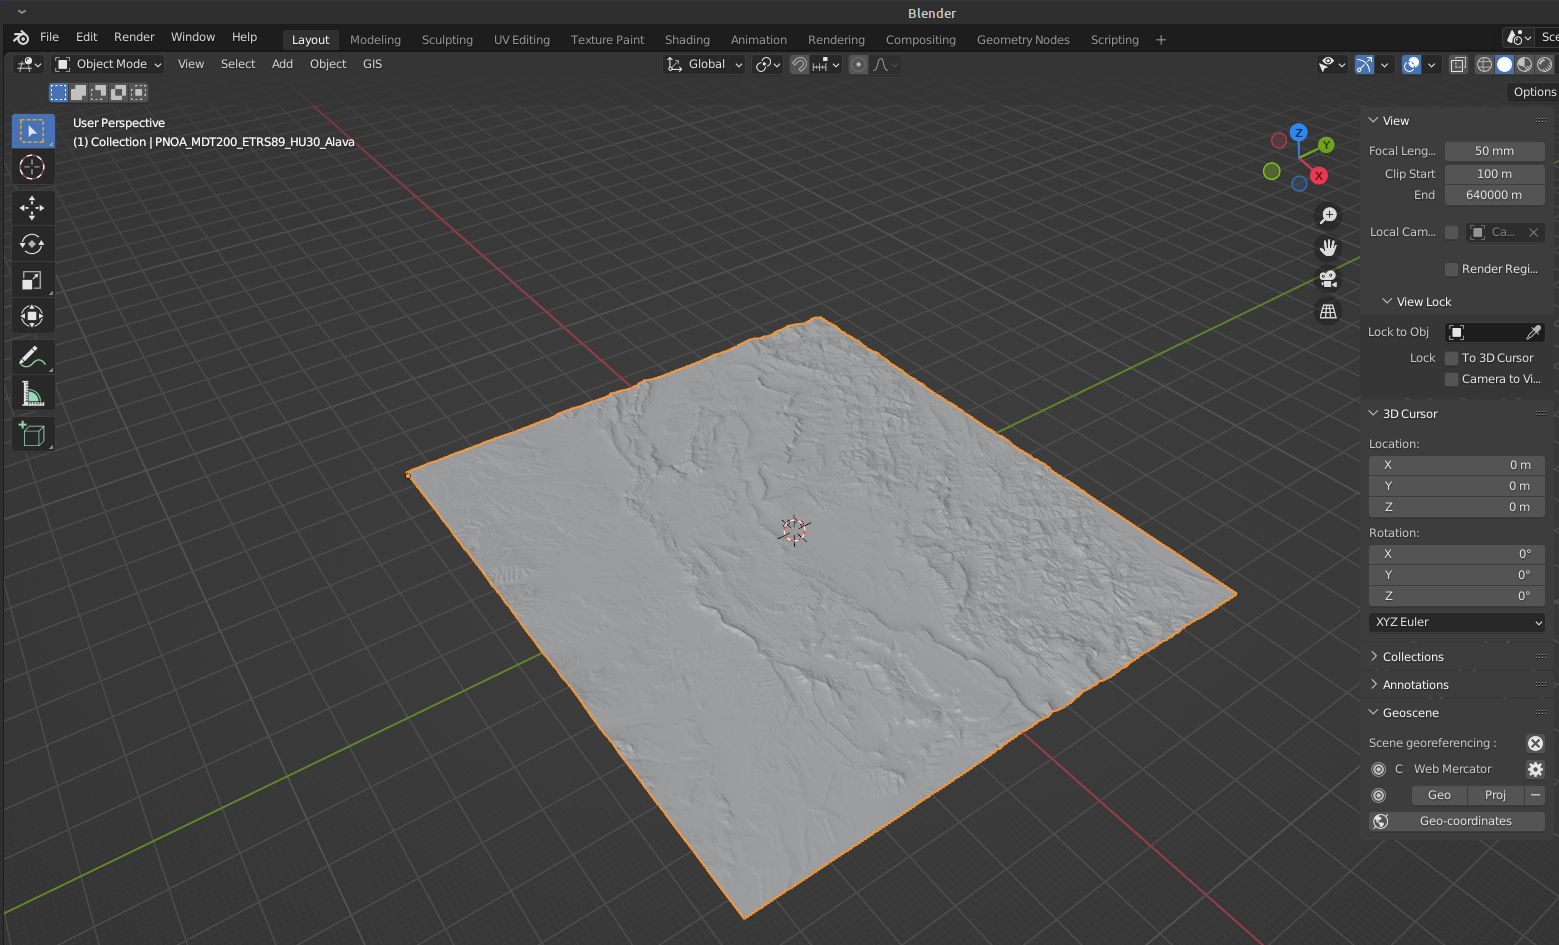
Using the "GIS" menu, import the terrain layers as an ASC grid. You'll see it quickly shows up on screen.

TIP! This model is centered in coordinate origin, but you can georeference the model setting a CRS in the "Geoscene" properties.

Let's add the satellite image:

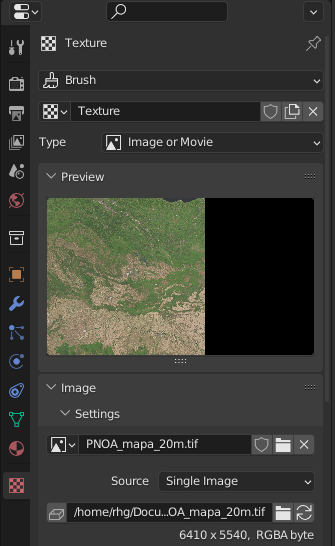
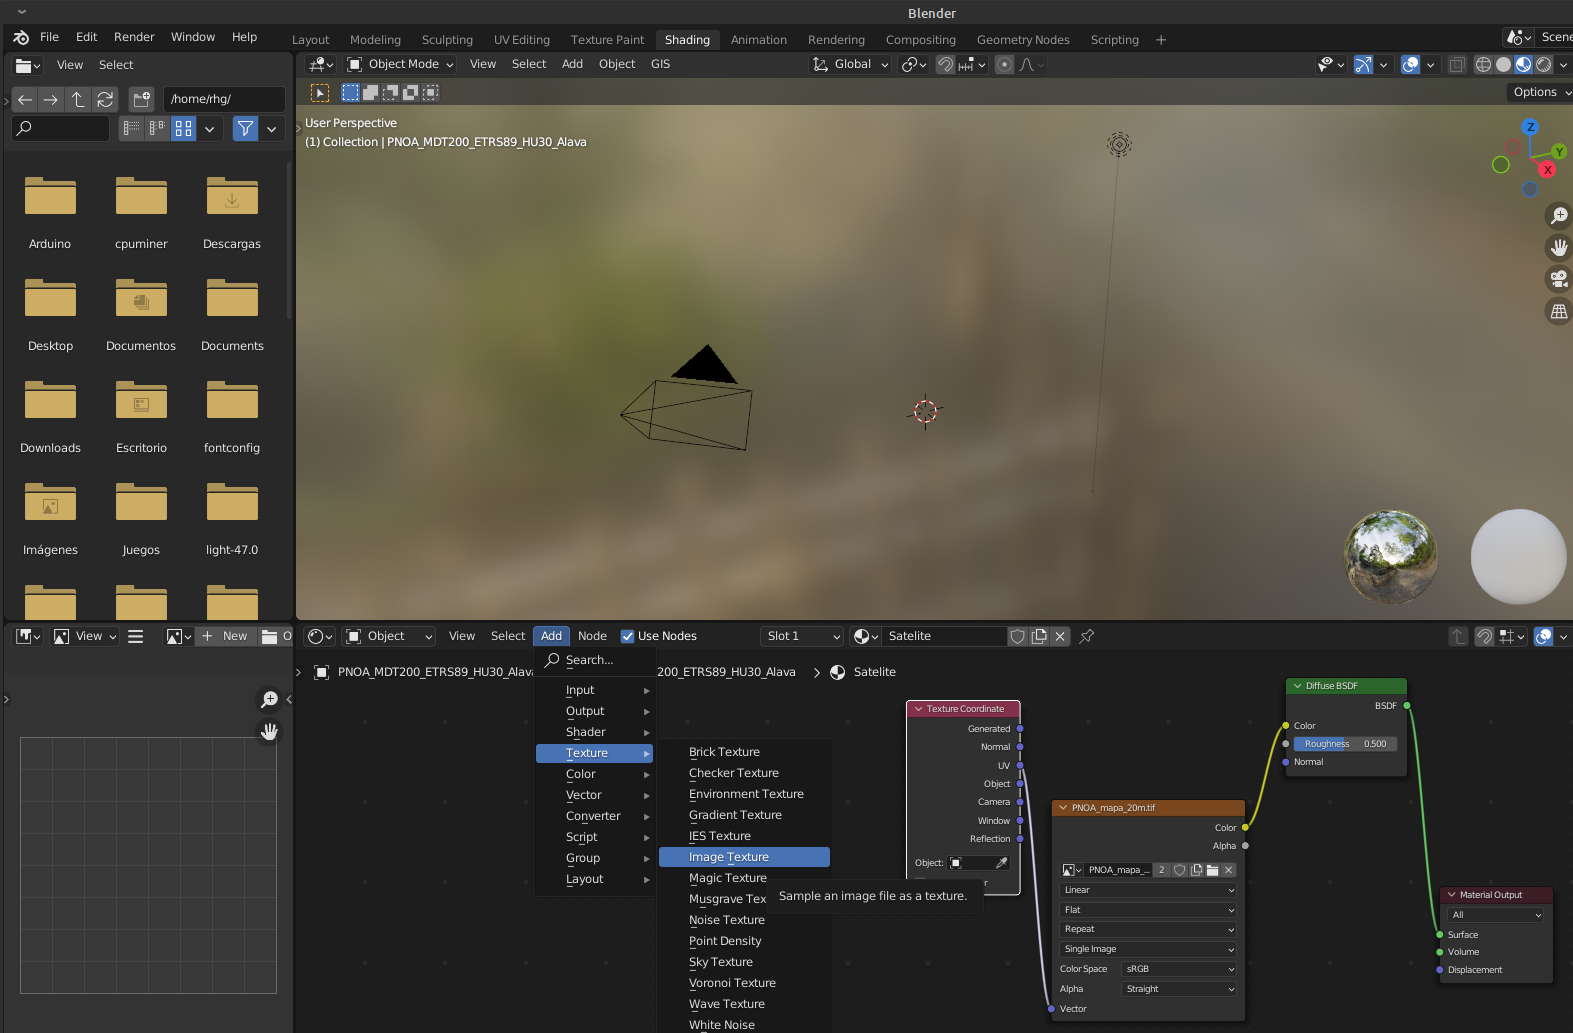
  1. Create a new material.
  1. Create a new texture and load the satellite image.
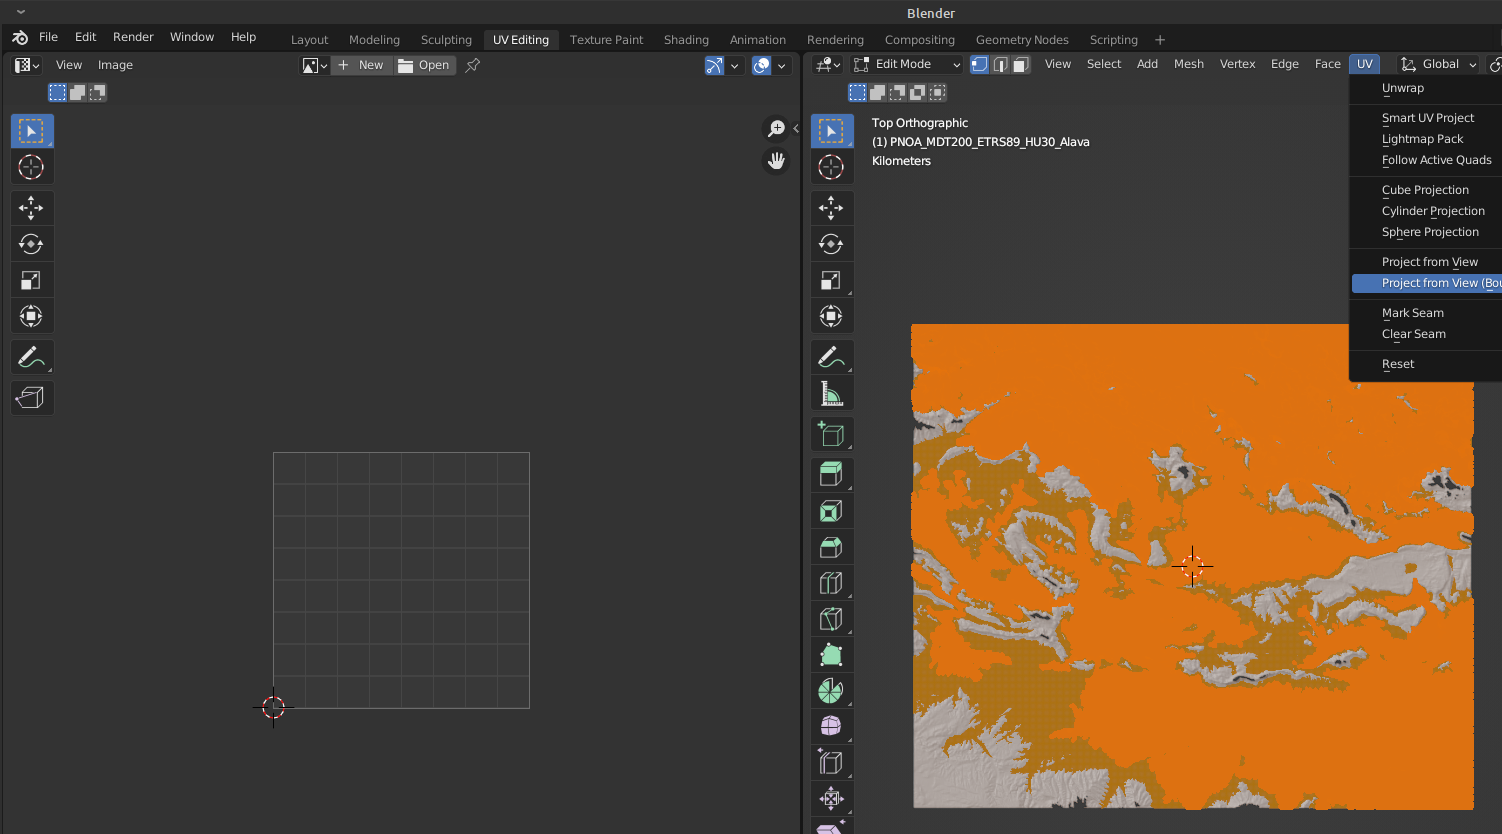
  1. Now move to UV Editing tab.
    • Select the terrain layer on the right window, enter Edit Mode, and "Select all" faces (Ctrl+A). You should see it orange as below and make sure you are in "Top" view (press number 7).
    • Click on "UV" tools in the top menu and project the terrain layer with "Project from View (bounds)". This makes it fit the image extent.
  1. On the left window, choose the image texture to apply to the projection and see how the grid adjusts to it (try making zoom on it)
  1. Finally, go to the Shading tab and add the element "Image Texture", choosing the right image and connecting Vector to UV and Color to Shader (just copy the image below).

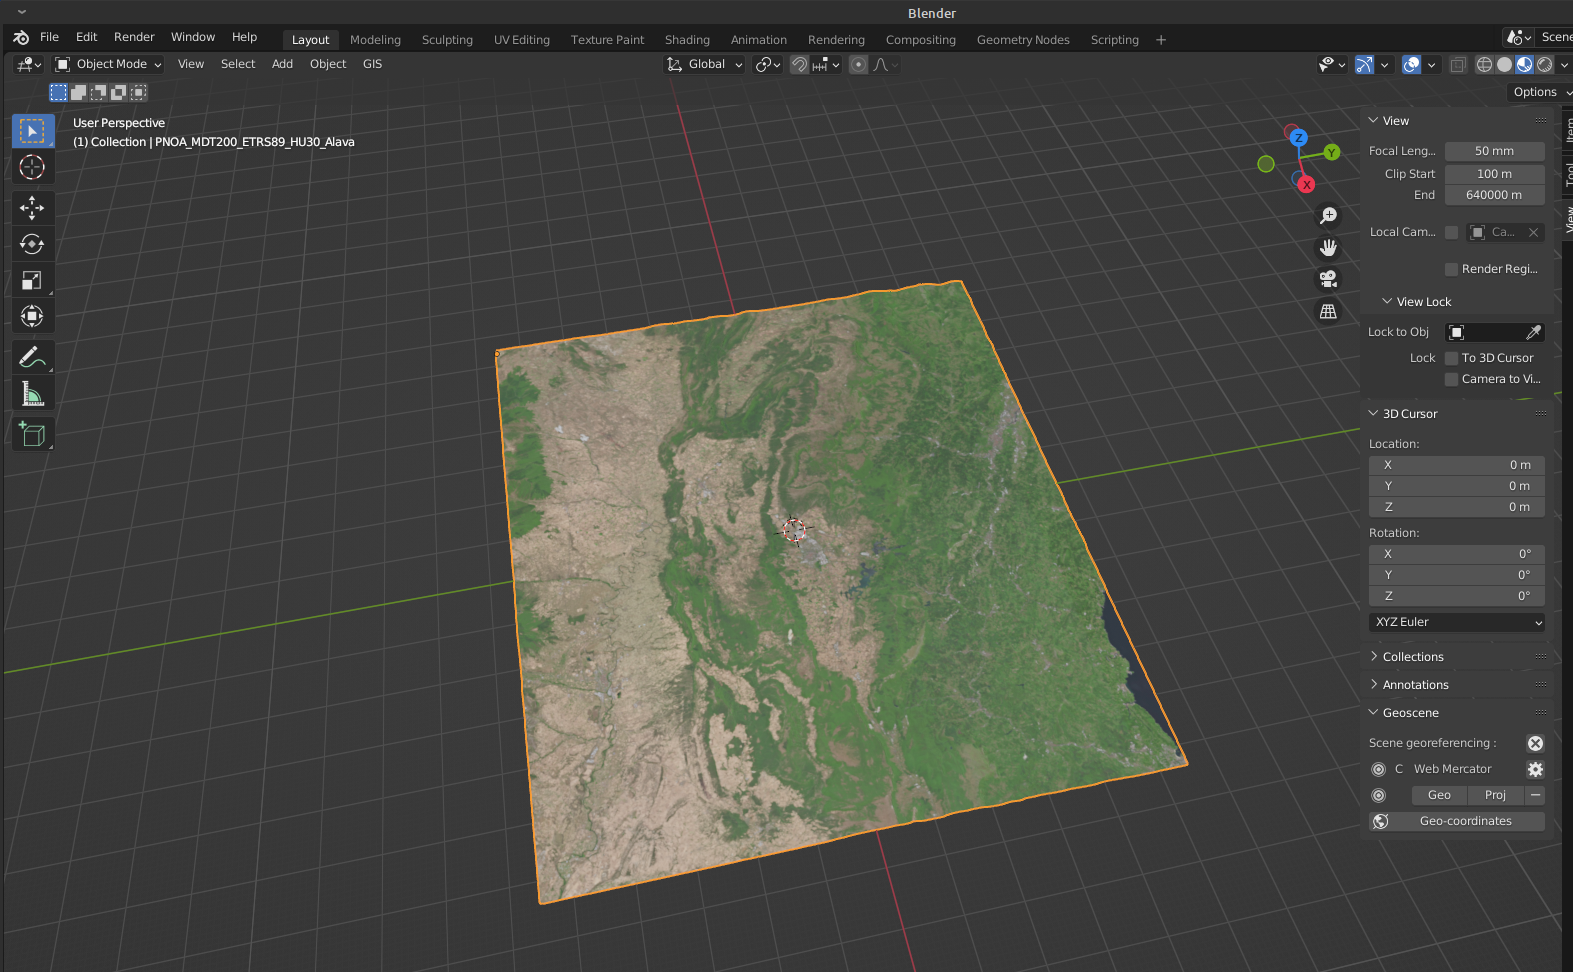
If you now go to the Layout window, the model will show the satellite image perfectly adjusted.

And it's ready so you can edit and export your model, for example, for 3D printing or for a realistic Unity3D scene.

Doubts or comments? Come over 🐦 Twitter!

🐦 @RoamingWorkshop