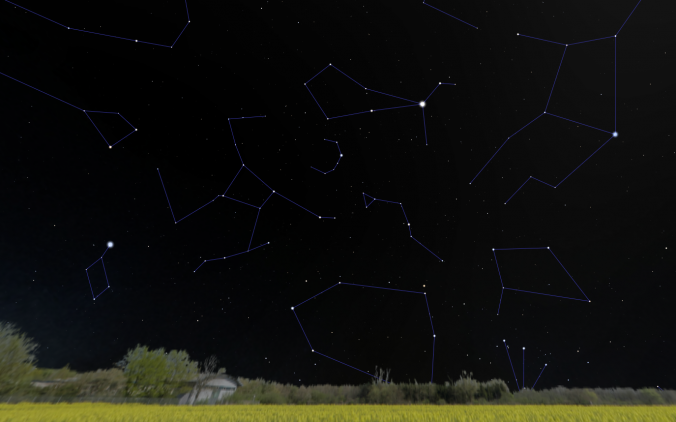
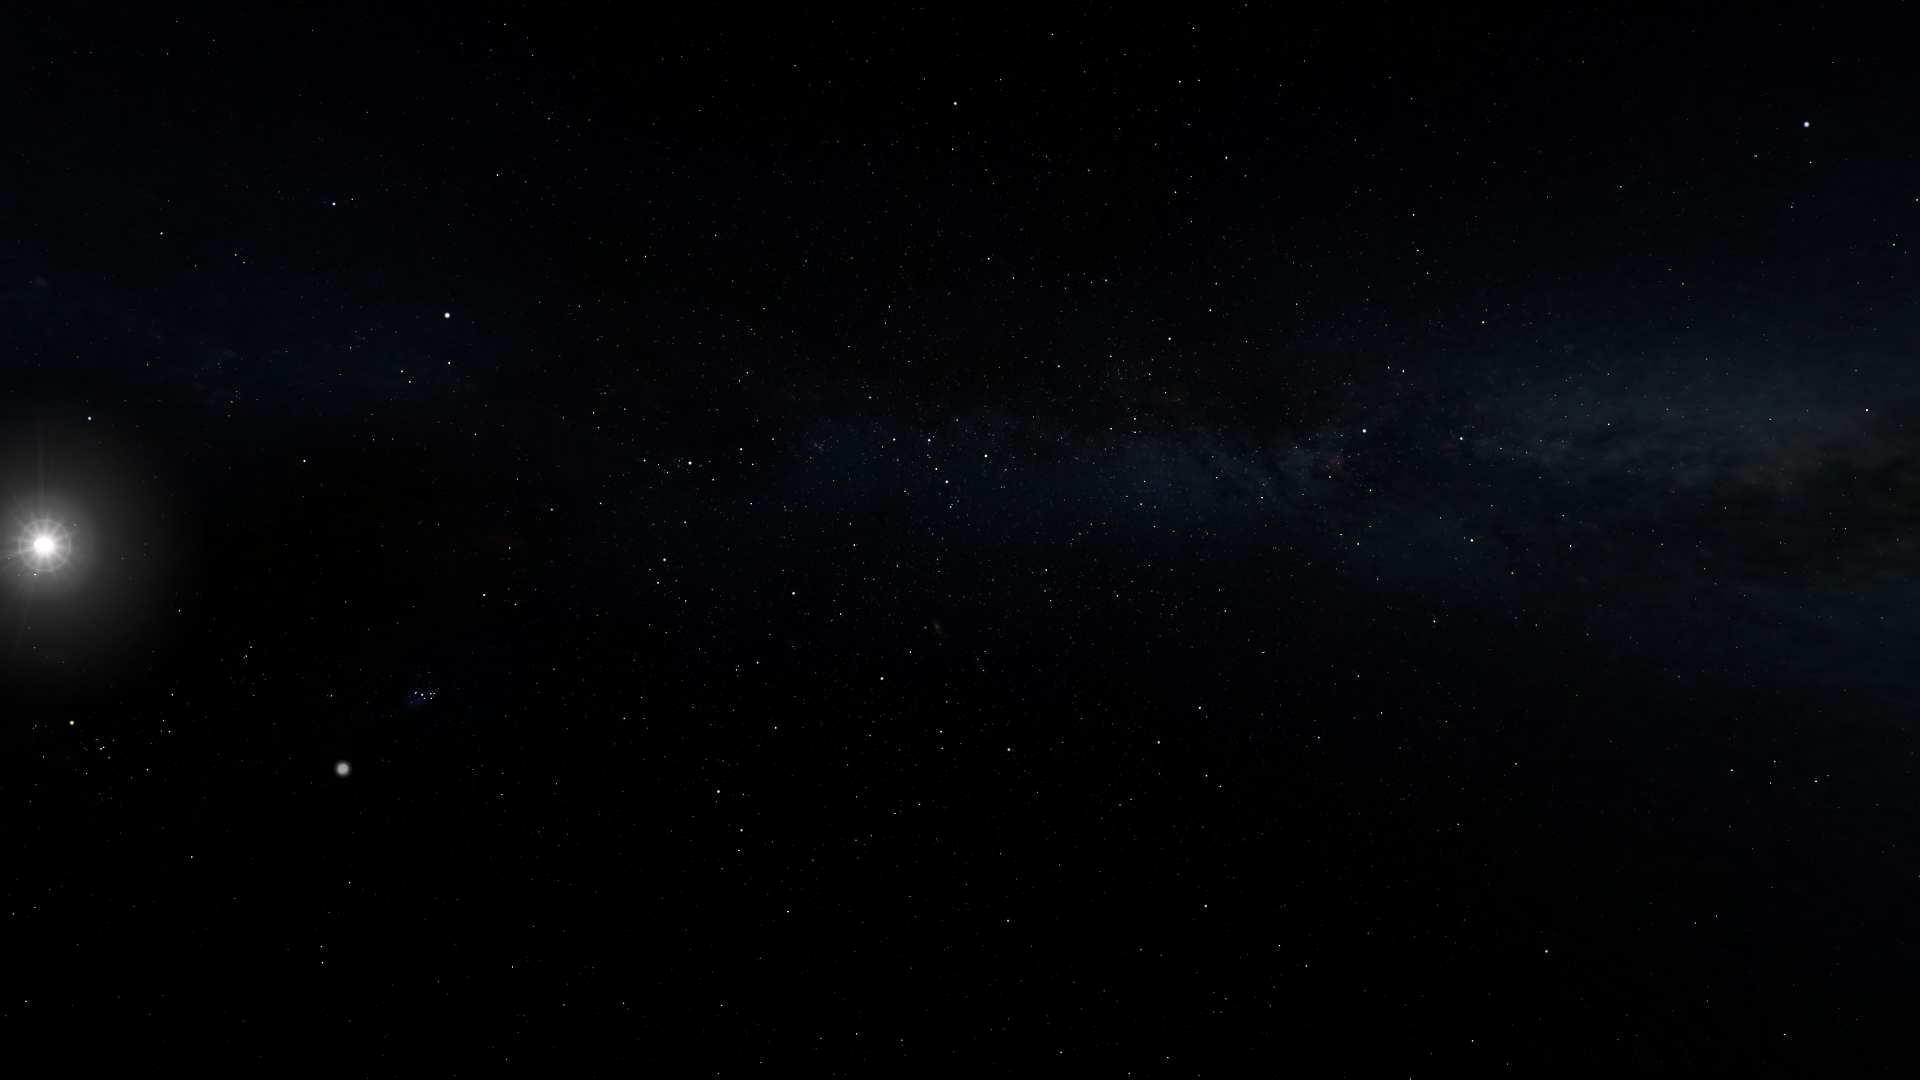
Did you wonder where did I get the header picture?
It’s not from the internet, not from any telescope. It’s from the great software Stellarium, an open-source planetarium with astronomical precision and unbeatable realism.
Requirements
Stellarium is available for Windows, Mac and Linux, with a web version seamingly amazing, but lacking the configuration and plugins options that are offered by the desktop versions.
As they indicate in their website, the minimum requirements are:
- Linux/Unix; Windows 7 and above; Mac OS X 10.12.0 and above
- 3D graphics card which supports OpenGL 3.0 and GLSL 1.3 or OpenGL ES 2.0
- 512 MiB RAM
- 600 MiB on disk
- Keyboard
- Mouse, Touchpad or similar pointing device
And recommended:
- 64-bit operating system
- Linux/Unix; Windows 7 and above; Mac OS X 10.12.0 and above
- 3D graphics card which supports OpenGL 3.3 and above
- 1 GiB RAM or more
- 1.5 GiB on disk
- Keyboard
- Mouse, Touchpad or similar pointing device
- Moderately dark environment (deep shadow or indoors)
Basically it works in almost any device. Just download it from one of the options in the top menu.

Initial configuration
At startup, the position of all objects is synchronized with the PC time and it will be updated in real-time.
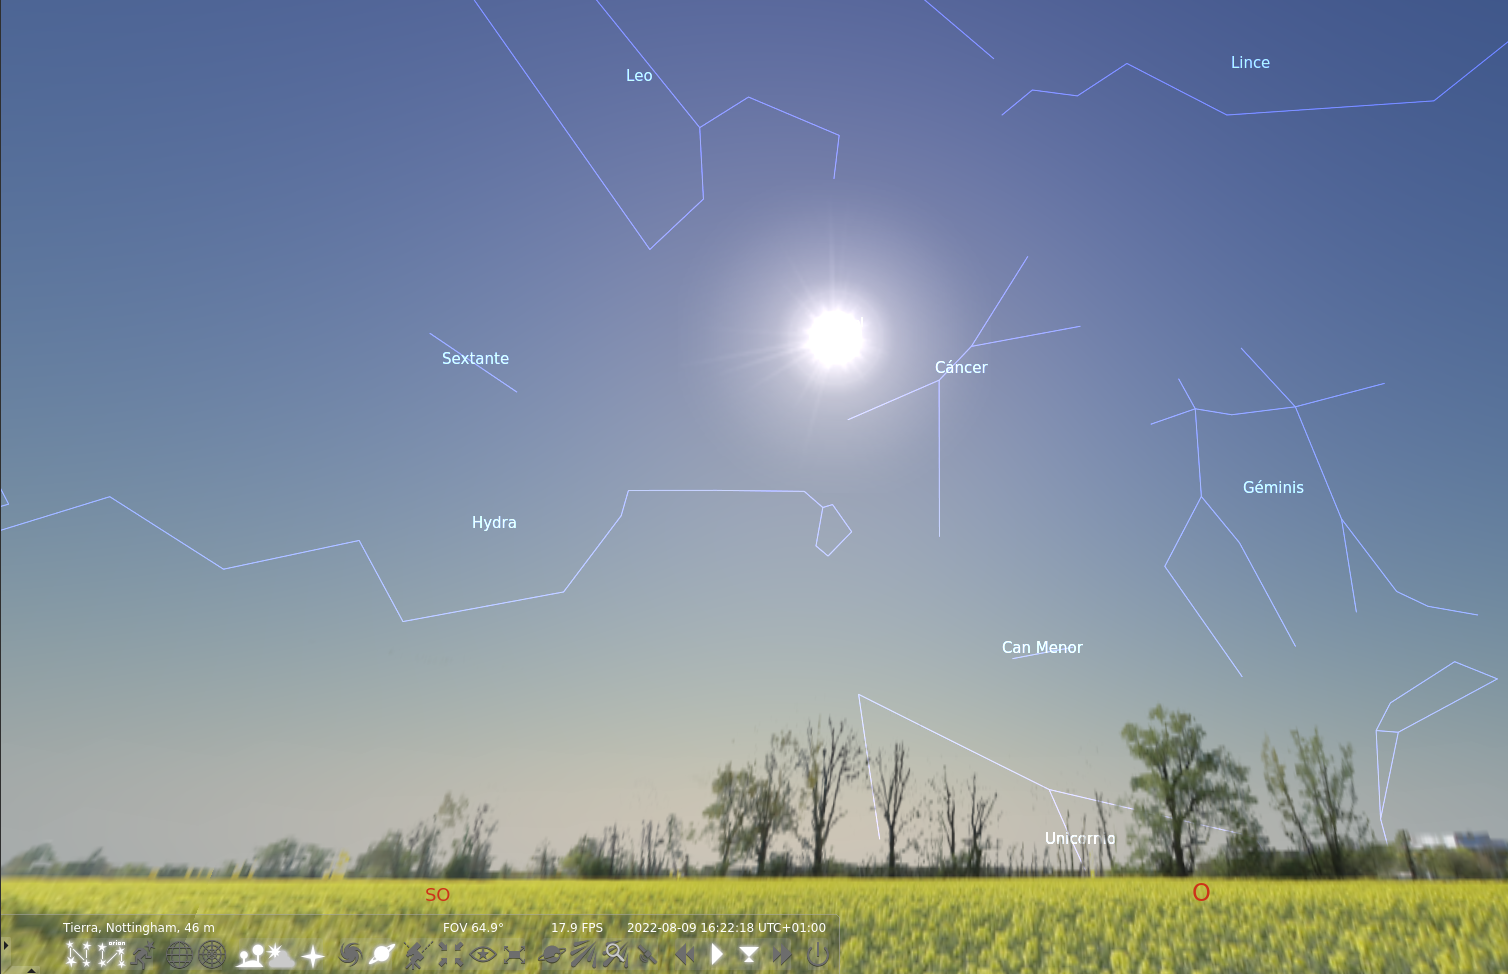
Using the bottom menu (or its [shortcuts] ) we can activate/disable different view elements. I recommend that you play with all of them and set it as you like:
- Constellation lines
[C]. - Constellation labels
[V]. - Constellation art
[R]. - Equatorial grid
[E]. - Azimuthal grid
[Z]. - Ground
[G]. - Atmosphere
[A]. - Cardinal points
[Q]. - Deep-sky objects
[D]. - Planet labels
[Alt+P]. - Switch between equatorial or azimuthal mount
[Ctrl+M]. - Center on selected object
[Space]. - Night mode
[Ctrl+N]. - Full-screen mode
[F11]. - Show exoplanets
[Ctrl+Alt+E]. - Toggle meteor showers
[Ctrl+Shift+M]. - Show meteor showers search dialog
[Ctrl+Alt+M]. - Satellite hints
[Ctrl+Z]. - Decrease time speed
[J]. - Set normal time rate
[N]. - Set time to now
[8]. - Increase time speed
[L]. - Quit
[Ctrl+Q].
On the lateral menu we have the following options:
- Location window
[F6]. Here we can specify the location of our view, being a place on Earth or any other planet in the list. - Date/time window
[F5]. We can choose any date from past or future as the orbits are perfectly known for centuries. - Sky and viewing options window
[F4]. It lets us calibrate the visibility of objects, the projection or the landscape picture, between others. - Search window
[F3]. It will locate an object from space by its name. - Configuration window
[F2]. Shows settings like language, system time, the use of extras or scripts, etc. - Astronomical calculations window
[F10]. Shows the details of calculations done by the software, like object positions, or events that occur today. - Help window
[F1].
Uses
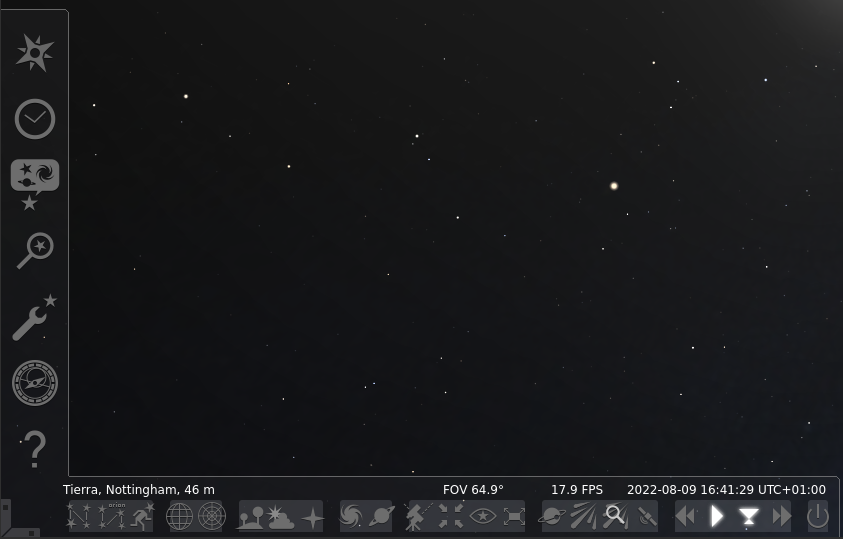
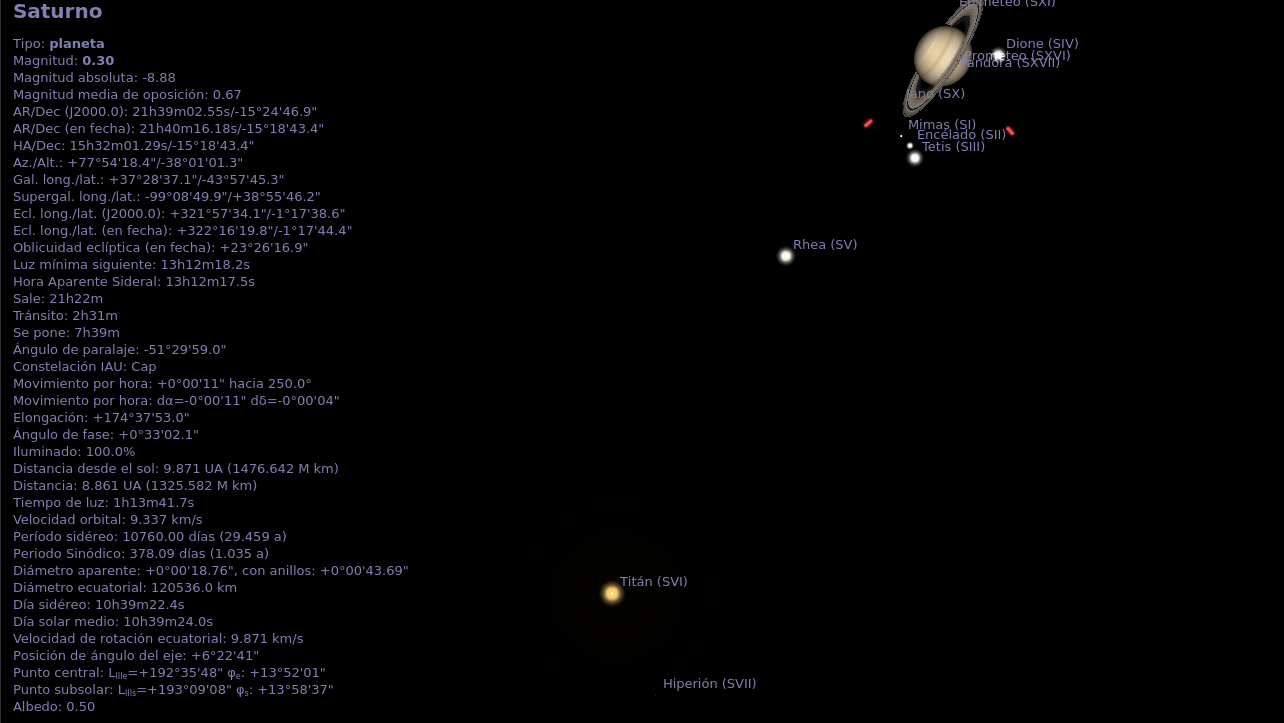
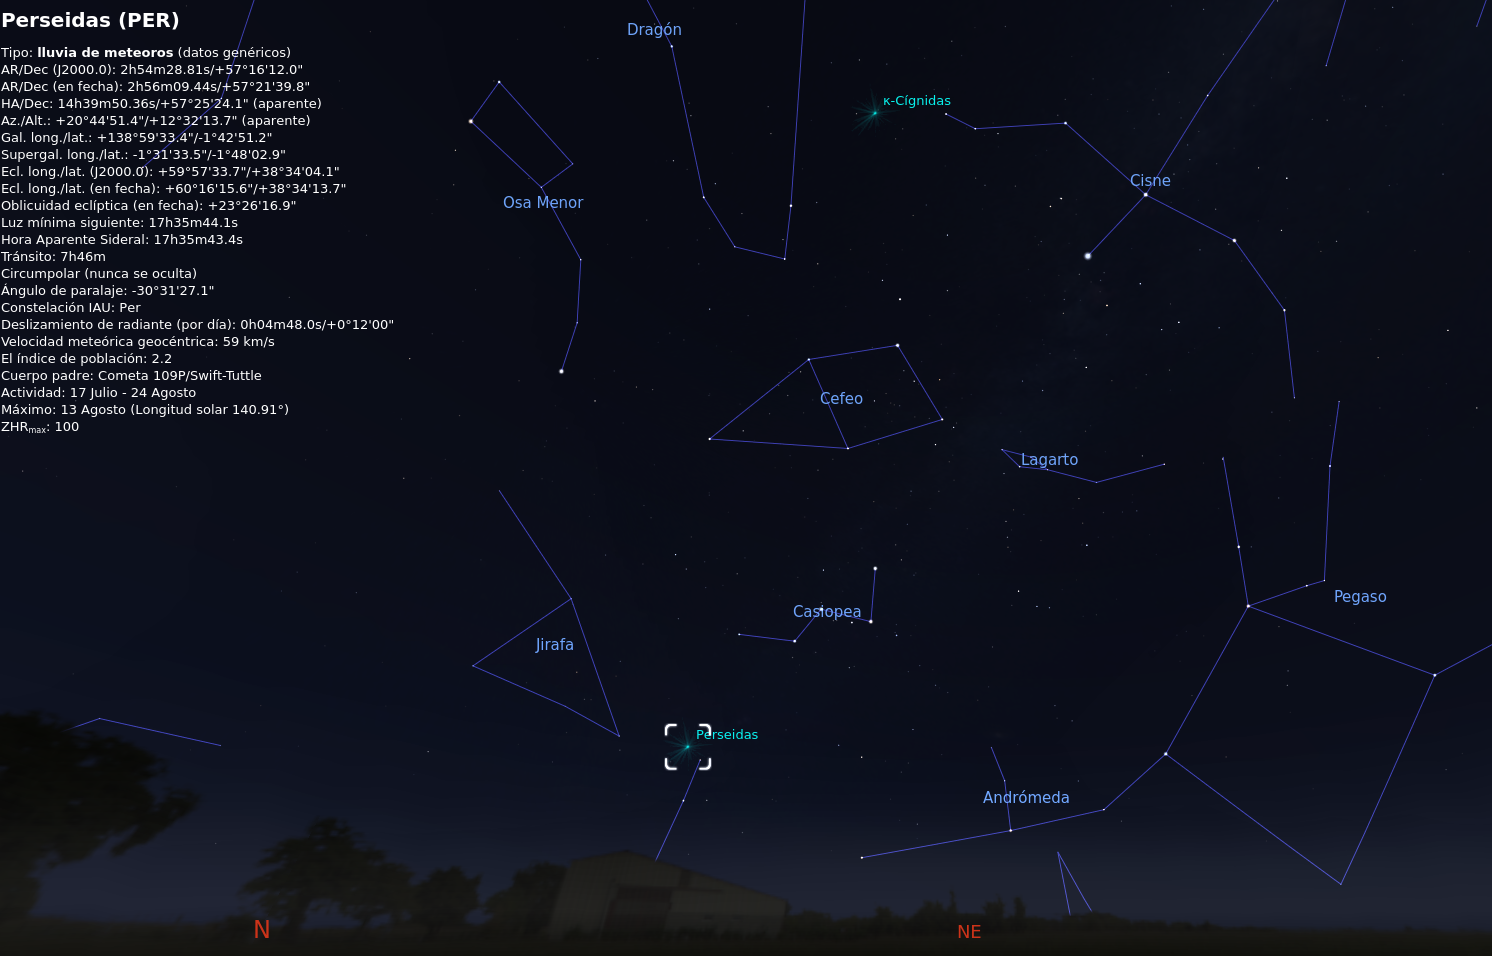
We can simply disable the atmosphere [A] and investigate the objects in space left-clicking on them, which will show information about the selected object. If we press [Space] the view will follow the object.
We can also activate constellation lines [C] and labels [V], show meteor showers [Ctrl+Shift+M] and advance time until the sun sets [F5] or [L]. This way we can find out if there will be a starry night (or any other night) and know its location.
Now in August we are reaching the Perseidas maximum activity, that will occur on 13th August according to the calculations for the Iberian peninsula, and will be located moving from North to Northeast.
Or simply play with the many possibilities of the software and get an incredible background picture like the one used on the header of this blog.
Do you imagine any other possibilities for the software? Any configuration tip or any worth script? Leave your comment on Twitter 🐦 See you soon!
